Saturday, 27 March 2010

Evaluation Question 4

Q. How did you use new media technologies in the construction and research, planning and evaluation stages?


Right from the start of the year when we found out about what our project was for our A2 coursework we have used many different media technologies to prepare ourselves for it as well as when we were constructing the coursework. The very first thing that we did was to design our header for our media blog. This was done using the program photoshop. This program wasn't new to us because we used it for our year 12 coursework so we just had to remind ourselves of how to use the program. The program photoshop became very important throughout the whole project as it was needed to edit photos that we wanted to use for our Digipack and pictures for our website. Below are some picture of some of the effects we created using the program photoshop.


These photos show us using photoshop on a picture we chose for the front cover of our Digipack. the first photo shows the use of the clone stamp tool. I decided to use this tool because then i could get rid of the real advertising on the T-shirt and it would make the T-shirt look like it was plain grey. I wanted to do this so i could place a word of my own there that i wanted to use on the front of the album. The second picture shows me changing the brightness and contrast of the picture. I needed to do this so it would look presentable as an album cover and one that would fit in with similar conventions. We also needed to do this so the picture will match the brightness and contrast of the picture that will be placed on the back of the album cover.


This photo shows us adding the image of the girls in our video to the front panel of the Digipack. We decided to do this after some audience feebback from our teacher. She said that by placing them in the background somewhere would make the image look more like a dream effect and this would link in well with the title of the song. To make the image appear more dream like we had to change the opacity to fade the picture into the background more.

Another technology we used throughout the project was the Internet. This was a major part of our planning stage as we had to research things such as, costumes and ideas for our video, settings for our video, also different fonts we could use for our Digipack and Website.

Below is a link to the website Dafont which became very helpful to me and my group throughout the project. This gave us a variety and choice when it came to Designing our ancillary tasks.

http://www.dafont.com/

The Internet was also vital for research into similar and existing products. We looked at videos from Youtube when we were deciding on the song and type of video we we were going to produce. We also looked at existing albums that have been released by current stars. We also looked at websites that they had released, and this helped us to see the continuity between their products. The internet was also vital becuase the use of social networking sites helped us as a group, because it allowed us to contact each other easily and arrange days for filming and planning when we were going to do certain things. Also the internet provides us with the program blogger in which i am writing this evaluation on now and this had been vital for the coursework element due to the posts that have had to be made throughout the project.


For the filming element a camera was used to capture all the footage. This was new to some of us as we did not have experience in capturing large amounts of precise and in depth footage. This camera was used with a tripod as this enabled us to keep the camera still for shots and reduce movement to make it look more proffessional. Once filming had proceeded the program we used to ed it our video was Final cut express. This program was not new to us as we visited in year 12 when we made a practise music video. This program was vital and it enables us to add cuts, cross dissolves, slow the footage, speed it up and change the colour of certain scenes. It also allowed us to add the music to the footage that we had filmed.
Below are two images showing the type of editing that we achieved using final cut.

This image shows us adding a cross dissolve into a section of our footage. We did this to show that time had moved on and he is in a different place but he is still doing the same thing. We wanted to create an effortless flow within our video. This was quite a challenging task because we had to make sure that the movements of the legs started and finished at exaxtly the same movement from shot to shot. There was a lot of cutting and deleting bits of clips in this process.


This image shows us reducing the speed of the clip. We did this because we wanted the clip to flow with the music. At this point the music was really slow and seductive so we wanted to create that look with our actress by slowing her movement down. This was also quite hard because there were a few other shots of this actress and the other that we had to have follow each other so we also had to add a lot of cross dissolves. But the speed of each clip had to be right to make the video flow correctly.

Another tecnology we used was Dreamweaver. This was used to design the website for our artist and their product. Although the girls were mainly the ones behind the website i understood that this program enabled them to add links, videos and pictures to the site that would help keep the relationship between the website and the other products strong.


Another technology that i used was a canon camera. This was used to gather images for the Digipack and website, as well as taking pictures of the locations and settings we used. It was also used to provide evidence for audience feedback on our music video.

The use of most of these technologies would not have been possible without the Apple Mac computers that we were lucky enough to be able to use most of the time. These computers also enabled us to use a method called screen grab. This allowed us to take pictures of things that we have done and whilst we were doing them. As you can see this is very helpful for blogging and it is especially useful for the evaluation. It gives people another way of seeing what you have done other than just reading text or viewing the finished products.

list of technologies:


-Apple Mac computer


- CS3 Photoshop


- Final cut express


- Dreamweaver


-Canon digital camera


-Canon video camera


- Internet resources (social networking sites, vimeo, dafont, google, blogger)

Evaluation Question 3

Q. What have you learned from your audience feedback.?

Throughout this project audience feedback has been very important for us because it allowed us to look back at different ideas and advice people had given us and this helped us immensely when it came to making our video and ancillary tasks.

The first time we got given audiene feedback was from our teacher when it came to pitching our idea for our video and song. When we did this she said that she liked our idea and she gave us tips and ideas of her own that we could use in our video to make it more effective. After recieving this feedback we went away and decided as a group how we was going to film and make the video. Whilst we were out filming certain areas of our video we decided to ask the actresses in our video for some of their advice on some of the shots we should take and what they thought about our ideas for the video. This helped because it showed us peoples different perspectives, and gave us an idea on what ideas we were defintly going to use and what ideas we wern 'tto sure about. Once we had filmed our video we edited it into our rough cut. Once this process had been complete we showed it to our teacher. The criticism we got from our teacher was much greater than anybody else but this was expected due to the fact that she wants to see you get the best grade you can and her experience in the subject means she has a wider knowledge than most people. Her main criticism was that some of the shots were too long and they needed to be seperated with cuts and effects such as cross dissolve as this will improve the continuity and make the video more appealing and exciting. Another criticism was of me the actor during the video i repeat a certain movement too much and she beleved it to be too noticeable. This was something that unfortunately we wasn't able to change too much in our video. As this was my fault i felt slightly dissapointed and that i had let the rest of my group down, as i should have realised that i was doing it too much and corrected myself. Our teacher also picked our good points within our video. She believed that there was a certain part of our video that had a great relationship with the music behind it. Also the story behind the video was a great idea and it went well with the song.

Once the teachers feedback had been recieved we got some of our fellow classmates to watch our video and write their comments on a piece of paper. Our fellow classmates were less critical but what they had to say was still very important to us. This was due to the fact that they were around a similar age to who our target audience was for the video. It gave us a realistic reflection on what people of a similar age would think. Some of our classmates also picked up on the fact that some of the editing needed working on so this just confirmed to us something we could work on for the final cut.
examples of our classmates audience feedback;


Evaluation question 2

Q. How effective is the combination of your main product and ancillary tasks?


'American Dream' Final cut from Daniel Jeffery on Vimeo.


As an artist one thing you hope to achieve is that your products are easily recognised as yours and audiences can relate to each product that you produce. Our aim as a group was to produce a main product and two ancillary tasks that would be instantly recognisable with each other and that would create a high level of continuity. In our three products the male actor is the predominant feature. We have done this so the artist gets as much attention as possible so the audience feel like they have a clearer representation of the artist they like and who they are buying music from. When we did our research into existing Digipacks and websites we realised that the more successful artist seemed to have very similar album artwork to their website and its design. This is visable in our products as you can see similar images from the album artwork placed on the website. The video is also clear to see on the website so this continues the theme as well as promoting the song. The video was the first thing that we did, so it creted a background and standard that we could relate to and transfer into our ancilary tasks. The videos main theme was the dream effect that we wanted t portray in our video. We wanted to do this because it goes really well with the title of the song as well as it gives us the oppurtunity to make a video that went really well with the song. This was a major factor as most good music videos make sure their video relates to the words in the song and the audience can clearly see this. Within the dream stage of our video the main aspect is the appearence of the girls in a fantasy style. This adds to the dreamy effect as well as adding a more unique and sexy look to the girls. If we were to have the girls in our video appear in normal uniform the video would not have the same effect and the dream effect would not appear as effective.


When it came to our Digipak we made sure that the design of it would be based solely on the video. The main images for the front, back and inside of the digipak were all taken on the day we filmed our dream part of the video. By doing this we ensured that their would be a high level of continuity from video to Digipak, and our target audience could relate from product to product. We also ensured that there was a link from task to task through the use of snap shots. This technique enabled us to use shots from our video as pictures in our ancillary tasks. By doing this it was obvious that there would be a link but we had to make sure we used the correct images, that not only made it so there was a link but also made our Digipak and Website look presentable and to a high standard. As well as this the use of Photoshop allowed us to blend the picutres from the video in to the digipak as if they were taken from a camera and it made sure the quality of the picture looked sufficient.


When it came to the website there was certain ways we created a link but there were also differences. The link was created through snap shots from the video of the main actress Georgia. As well as the use of links to show our video on the website. By doing this i believe that we have rounded of all three products together into one of our ancillary tasks, and if it were a real website then out target audience would find it very useful and productive because they could see the link from product to product themselves and this would help them get a feel for the artist and what he is about. We also tried to keep the colour scheme similar to the Digipacks scheme. Although it was not perfect due to the fact the Digipaks main them was woods. We believed that we couldn't use a woodland theme for the website due to the fact that it would not look as effective and proffesional as a normal colour scheme would. It would also be too similar to the digipak. Despite this we have managed to keep a good level of continuity by using black as the dominant colour. I nelieve this also adds a sense of sophistication to the website aswell. The colour blue is also used a lot and this goes well with the colour of the shirt the artist is wearing in the picture on the website itself. Overall i believe we have managed to keep a high level of continuity from our main task to our ancillary tasks. I think that our target audience could see a link in one of the products to the next for example they can see from the video the ideas for the digipak and from the website they can see the video itself.


HTML scrollbox


Evaluation question 1

Q. In what way does your media product use, develop or challenge forms and conventions of real media products?

For our media product we chose the song 'American Dream' by the artist Jakatta (also known as joey negro or dave lee). This song was a dance/house song and this was an important factor in why we chose to design a video for this song. This is because the genre of dance have a wide variety of videos for the songs in that section and there isn't an overwhelming trend in every video in that genre. (As demonstrated below)


(Remady 'No Superstar' 2010)


(Stonebridge 'Put em high' 2005)

As you can see from the videos above the dance industry have produced many different videos over the last decade. For our video we wanted to combine a range of conventions we have seen being used in existing dance videos and try to bring them across in our video. We decided that our video would tell a story. We researched existing music videos that were run in this way and we thought that our song could tell a certain story. Songs such as '9PM till i come' by ATB and 'You don't know me' by Arman Van Helden have videos that are a series of events that run in a sequence like a story. When it came to our video we didn't want our story to be too serious we wanted to add a playful twist to it. We believed we could do this with our song due to certain areas of the song that gave us different dimensions to work with. The song we chose had a minimal amout of words in it and the vocals that were used were said in a fantasy like whisper from a womans voice. This gave us the chance to follow similar conventional dance music videos and add good looking girls to our video that would fit in well with the sound of our song. The story behind our song is of a man waking up in a woodland area during a dream. He sees a fantasy looking girl that he has seen before he attempts to follow her and he also sees two more fantasy looking girls. He ends up kissing the main girl and then waking up as if it was all a dream. We decided to leave a twist at the end of the video because when he wakes up he still has the kiss marks on his cheeks from the girls and this leaves it open for the audience to decide on what has happened in the video. I believe that although there are similar conventions withing our video, the ending makes our video different from many music videos of this kind in the current market. Although the dance industries musiv videos are quite broad when it comes to the content of them, there a lot of modern dance videos that have dancers throughout their video dancing to the song. So i believe our video differs from current media conventions in that way as we have not gone for that type of video. Another important feature that you see a lot in music videos is where certain parts of the video match the lyrics. I believe we achieved this during our video when the lyrics that our song had came in.


Another dimension that we noticed in almost every music video is the use of close ups and medium close ups. This filming technique is used to show expression and emotion on the actors faces. This is vital in music videos because it shows the audience wat emotions the vieo is trying to portray and how the song is meant to be percieved. Below is a medium close up of georgia the leading actress in our video and a medium close up of a girl in an existing music video;


When it came to the diigipack we researched many existing artworks from curent artists. The majority that we saw had the artist on the front in some way or the other. This encouraged us to follow similar conventions and do something similar. By placing a picture of the artist on the front of the album we believed it showed a sense of pride in the work that he has achived (in our case me and my group). When it came to the back of the digipack we followed similart trends by placing the record label on the back and also placing a barcode on the back. We did this because it addded a sense of proffesionalism to our work. When looking at current albums I reliased that the inside panels link with the outside of the album and there should be a good continuity. I think that this a strong point about our Digipack, there is a good visual link between each panel. (As seen below)


(Current Digipack)


(Our Digipak)

When it came to designing a webpage for our ancillay task we researched many existing artist webpages. This research is demonstrated with this link below;


danieljeffery27.blogspot.com/2010/03/existing-artists-websites.html


We followed an idea that a lot of artists had done in their webpages and that was to add an image of the artist on the homepage of the site but show him in a different uniform or clothing that you see on the album cover. We did this by having a picture of the artist (me) in a suit. This completely differs from the album cover and it shows the audience the artist in a different light. We also added another trend that we noticed and we believed worked well, and that was to add a user name and login. We did this because if our product was real to life this would encourage thre audience to sign up to the artist homepage so they can view more of the things he is involved with. By doing this it might result in the artist recieving a small fee or the audience being constantly alerted with information about the artist and this would keep them interested in him. Also on our website there were the chance to visit different pages on the website through the use of links. This was a common feature on artists websites and this gives us the oppurtunity to reduce the information on one page so it looks more presentable and the information is not crammed in. It also increases the number of hits that your website recieves as our audiences will visit more pages to see things such as the video, and this will also increase the time spent on the website. Below is pictures of the website homepage and a link page that shows the music video.


Evaluation Introduction

The aim of this coursework project was to create a music video for a specific song of our choice. We also had to follow this up with two ancillary tasks that were all linked together with the music video. After extensive research into existing music videos and songs we decided that the song that we wanted to make a video for was 'American Dream' by Jakatta. This song was a dance/house song from the early 2000's. The two ancillary tasks that we chose to do were the digipack (album cover) and the website promoting our artist and album. In order for our products to look proffessional and appeal to our audience we had to create a clear visual link between each product that we made.

Website Link

Below is a link to our finished website;


Website


Here are the pictures of our website that was created using the program Dreamwever. The first picture shows the homepage of the website. On the hompage the girls have provided their audience with a competition with a chance to win a prize, aswell as the chance to view the music video through a link they have provided. The second picture shows what the link opens up to be, and where the video is placed. As you can see there is an image of the main actress Georgia that we were able to gain from the video and by using photoshop we were able to make it suitable for the website.

Digipak 3D


This is the 3D design of our Digipak. We were able to do this by getting a template from the internet and placing our designs onto the format. This was all done with the help of photoshop and specific tools such as free transform and the magic wand tool. Once we had done this we were able to see what our product would look like in real 3D form and if it were on sale in a high street retailers such as HMV.

Friday, 26 March 2010

Final Cut

'American Dream' Final cut from Daniel Jeffery on Vimeo.

Digipack final product


This is the finished version of our digipack. The image on the top left is of one of the inside panels where the cd is placed. We decided to make the CD a picture of the setting and the main character to show good consistency throughout the digipack. The second panel which is on the top right i believe to be one of our strongest images and finished products. It is a picture we managed to take of the woodland setting where we filmed a large amout of our video. The writing is from the original record company that released the song 'American Dream'. When we contacted them to ask for permission to use their song they agreed and asked us if we could possibly show these credits somewhere in one of our products. We believed this was the least we could do as they allowed us to use thier song. The image on the bottom left is of the back of the Album. We believe that we captured a great image when we took this photo and it is a good representation as it shows the back of him and it is the back of the album. There is also the record company's name on the bottom left (Rulin Records) and a barcode on the bottom right to make the product look more like a real album cover you would see in the shops.
The image on the bottom right is of the front of the album. The main image is of the main actor (me) that is used in the video and who we want to represent Jakatta. I think this is good because it shows the audience who the artist is and it links in well with the video of the song American Dream. The second image that you see is of the girls that appear in the video. We have made the image fade into the background so the girls appear in a dreamy state, we believe this goes well with the title of the song and the album and it fits with the dream effect that you see in the video. I believe that throughout our Digipack we have managed to keep a good consistency between each panel and also our main and ancillary tasks overall.

Tuesday, 23 March 2010

Digipak draft 1


This is the first draft of our Digipak. When we were in the process of making this product we new that we would probably not get it right and spot on at our first attempt. Although by having a draft it gave us a background that we could work with and furthermore improve for our final product. We showed our teacher and classmates this product and this gave us some audience feedback we could work with. Our teacher liked the the two inside panels of our product but she believed that the panels were too similar overall and there needed to be something to go with the main character of the video. She also admitted to not really liking some of the fonts we used and the positioning of some of the words. These were all things we will work on for our final product. Our classmates believed that our digipak showed good continuity and the inside panel with the writing on was a particularly good panel and was our best panel. One students words were ; " The panel looks very professional and it looks like a genuine product". Overall i believe we have used good images for our Digipak but the design around them will have to be changed to gain a better and more professional product.

Friday, 19 March 2010

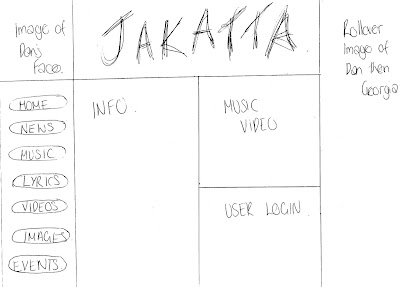
Website plan


Above is a picture of a plan that the girls made for the website they are designing.

Thursday, 18 March 2010

digipack progress

Album cover (inside):


Album cover (front):


Album cover (back):


Monday, 15 March 2010

Existing Artist's websites

Below are some links to existing artists homepages. We looked at some of these websites before starting to make our own to give us an idea on what existing ones look like and how they set out their ideas.

http://www.taiocruzmusic.co.uk/

http://www.dizzeerascal.co.uk/

http://www.calvinharris.co.uk/

http://www.thisisalphabeat.com/

http://www.tinietempah.com/

Sunday, 14 March 2010

Original photos


Above are some of the original photos that we took to use on the front and back of our digipack.

We chose to use these pictures because it shows the main actor used in the video of the single 'American Dream' and this is also the person we use to symbolise the artist 'Jakatta'. We used the same setting that appears in the video to continue a theme used throughout the promotional package. I believe that the front picture is good because it gives you a good view of the artist himself and it also continues the setting that you see within the video for the song.
I also think that the picture we chose for the back of the digipack is good because it shows a sense of lost that we also wanted to portray in our video. I believe that it also works well because it shows the artist from behind and the link that is the back of him being placed on the back of the album. It also works well with the front of the album because he is sitting on the same tree trunk, but just sitting in a dirrent position and perspective. One thing i have noticed with the two photos is that the lighting is slightly different. This is one thing that i will have to change on photoshop so that the pictures have almost identical lighting so that they run smoothly together.

Target Audience who is it?

A key part to this project is finding out who would relate and appreciate our video, and who the video should be targeted to. This is very important as then we can fully represent the specific genre in our video and ancillary tasks. By doing this correctly this should result in appealing to our target audiece.
Trough research into the artist Jakatta it shows that he is an artist that releases contemporay House and disco music that is very common in the club and party scene in the UK. Therefore taking this into account i believe that are target audience would be between the age of 18 -30, male and female, and working and middle classed people. I believe our video is the sort of video that you would expect to find on a channel like MTV Dance. I also belive that our song will be played on radio stations such as Kiss 100 and Radio 1 therefore also reaching the target age group of 18 - 30. I think that our target audience is quite a large one due to the popularity of the club scene in the Uk and abroad.

Friday, 12 March 2010

Audience feedback

Below are some of the thoughts of our fellow classmates after watching our video. We asked them to do this so we could get an idea at what we could do to improve our video. After seeing these comments and a few more, also our teachers comments we decide dthat we would have to speed up the editing of some of the clips in our video and also seperate some of the clips in our video to make them shorter and more effective. We realised that maybe our classmates may have been to nice to us and picked out the good points rather than some faults we may have so we also took the audience feedback that we recieved with a pinch of salt and we knew that there were certain areas we could improve in our video.


Thursday, 11 March 2010

Rough cut of video

'American Dream' Rough cut from Daniel Jeffery on Vimeo.


Teachers Comments:


- The camera is being moved to much during the filming it should stay still in certain areas of the footage.


- The main actor touches his head too much it is something that is too noticeable to the audience.


- Some areas of the video need to have more cuts and the editing needs to be at a quicker pace.


- Too many shots of the main actors back and there should be more shots of his face and where he is facing the camera.

Sunday, 7 March 2010

Editing our video

Below are a few pictures of my group editing our video for our rough cut. During the process of editing you realise the time and efforrt that is needed to put together a music video. When editing you have to consider many things. One thing is matching the shots and cuts to the music. This is a task that can be very challenging and time consuming. Other tasks involved in editng are importing, rendering, and many more.


Above is a picture of us changing the speed of a clip. We did this so the clip would run in parrallel with the music. By slowing down the clip it becomes bigger so it takes up more of the time sequence.

Above the picture shows us putting in a cross dissolve to our video. We did this because it creates an effortless flow between a clip. This is donbe by going onto effects and clicking dissolve and choosing cross dissolve. When placing a cross dissolve in you must make sure it is placed in the middle of both clips so the dissolve flows correctly.


Monday, 1 March 2010

existing Digipacks

Below are a few existing Digipacks that artists have released for their albums;


Saturday, 27 February 2010

digipack, what is it?

A digipack is a type of cd packaging Made out of materials such as card, paper etc. Digipacks can be made to open out like a book or they can be made in three parts. The digipack that we require to do must have four pictures in it so to make it open out like a book would be the obvious choice.


Friday, 26 February 2010

Filming day 4

Today was the fourth and final day of filming. This was probably the most important day of filming as it was the dream sequence in the woodlands. This is the main event in the video so we felt we had to gather a lot of footage and make sure the footage was good enough. We also had two other actress's filming with us today as we wanted two other fantasy girls to add to the dillusional world that the main actor has woken up in. The biggest problem that we face when filming was the fact that it was so cold it actually affected the time that we could spend out there filming. Due to this we had to keep going back into our cars for breaks to get some heat back in us! due to this it turned out to be a very long day. I believe that due to our best efforts we managed to get some really nice shots and a lot of effective filming took place. There was a certain shot that i thought was really good. This was an over the shoulder of georgia as she was sitting in a tree looking at the main actor (me). I belive we created a great image from filming this shot.

Tuesday, 23 February 2010

Filming day 3

Today was the third day of filming. The passage that we filmed today was the journey the main character makes from leaving work to his house. This is a very important stage to the video because it is when you first see the main fantasy girl (georgia) and it sets the scenario for the rest of the video. This was also a challenging part of filming as we had to create a scene where georgia seems to dissapear as if she wasn't there. We managed to do this by asking a man if he would kindly drive his van past so we could create an image where shes there before it goes past but gone when it goes past. We managed to do this quite well (in the end!) although there were a few attempts at doing this. There was also a very tricky sequence of filming where Hannah the camerawomen had to make sure she caught my reaction as i was moving my head up. There were many attempts at this because we had to make sure it looked right. In the end we managed to do it and this was down to good camera work from hannah. Apart from the weather the day was fairly succesful although the weather did affect how long we could film for as the weather did start to get quite severe.

Monday, 22 February 2010

Filming day 2

Today was the second day of filming. This took place at a local office. This was the start of our video and we wanted to portray the actor as a hard working middle classed man. I believe we did this through the setting and the clothing that he was wearing. I think that the day was very successful and we gained sufficient footage to create a great opening passage to our video.

Friday, 19 February 2010

Filming day 1


Today was the first day of filming our video. Today we concentrated on some of the main parts that i would be in as the main actor. The first thing that we filmed was the shots of me at home after work and the stages that followed where he fell asleep into the dream sequence. As this was our first day of filming it took us longer than we thought to film the sequence, due to us getting used to what camera angles and shots we need to use and the right lighting. This was also my first day of acting so i had to get used to performing in front of the camera.

images of the setting where the filming took place:


Thursday, 18 February 2010

Setting 2: the woodlands

Beneath are a few pictuers of the woods we used in our video shoot. As you can see the woods add a great sense of mystery and intrige. the woods are situated in West Kingsdown and they were perfect for a video shoot as they were quite and secluded;